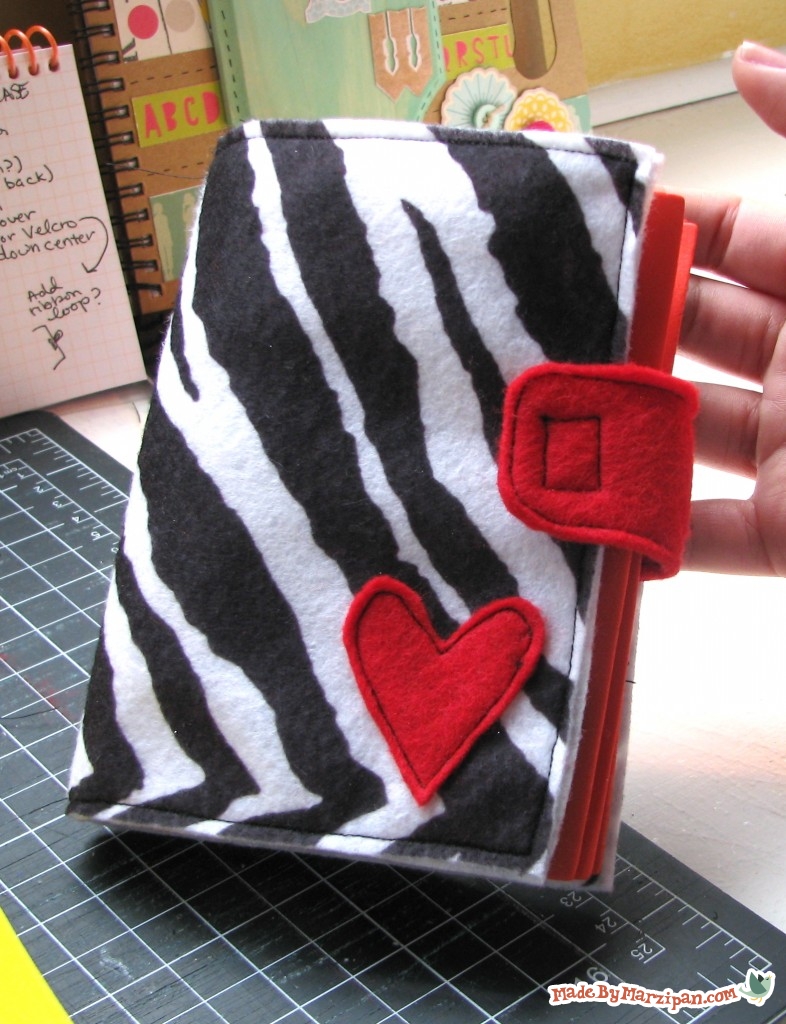
This Earring Travel Case is a useful little project that only costs about $2 to make. Congrats, you’ve just earned your Thriftiness badge!
How to:
1
Start by cutting the main piece of felt in half width-wise. These will become your book covers.
2
If you’d like to decorate your cover, you can cut a shape out of the other piece of felt. Pin the shape to the right half of one of your cover pieces. Topstitch in place.
3
Next we’ll make the tab closure. Cut a strip that’s 1.5 inches wide by 6 inches long from your second piece of felt. Fold in half, and topstitch the pieces together. I decided to curve the corners of my tab.
4
Trim around your stitches as needed.
5
Now we’ll put the cover together. Put one piece of cut felt face down, and put the other cover on top. Match up the edges. Slide the tab between the two pieces, in the middle of the left-hand side. Pin in place.
6
Continue pinning around the edges of the cover. Then topstitch together with a 1/8 inch seam. Remove the pins.
7
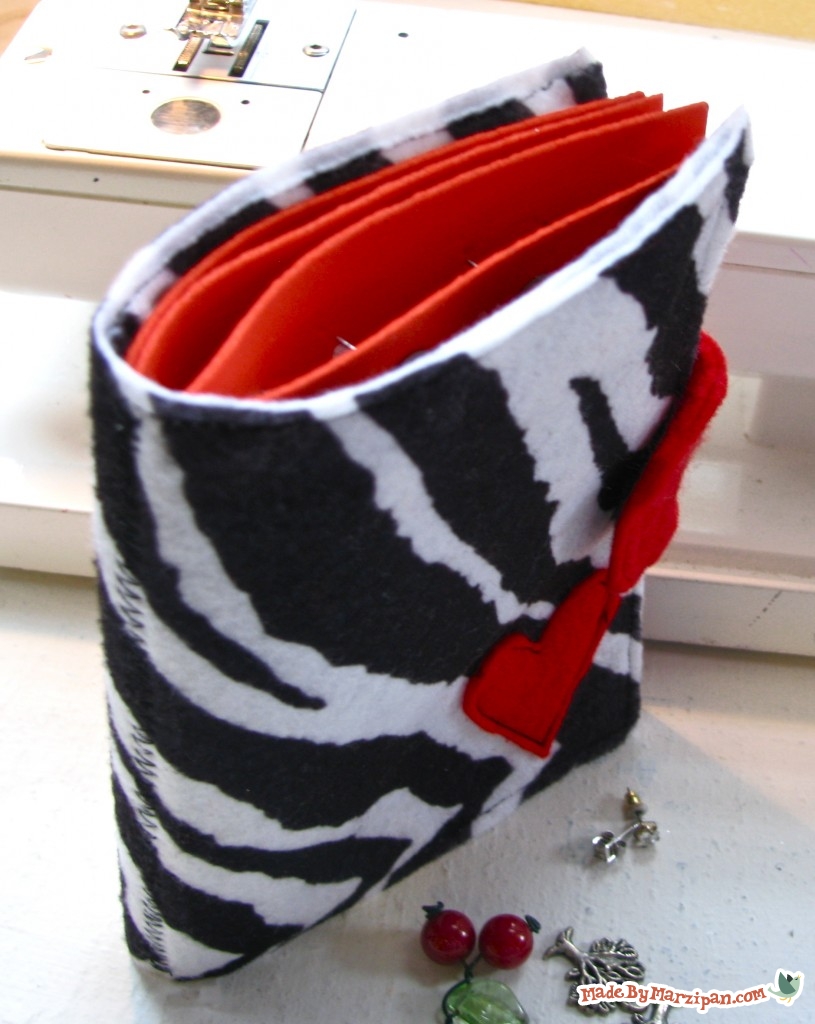
Sew a piece of Velcro to the inside of the tab.
8
Fold the booklet shut, then add the coordinating piece of Velcro to the front cover. Sew it close to the edge; the book will be bulky when you add the earrings, so you want the closure to have a lot of give.
9
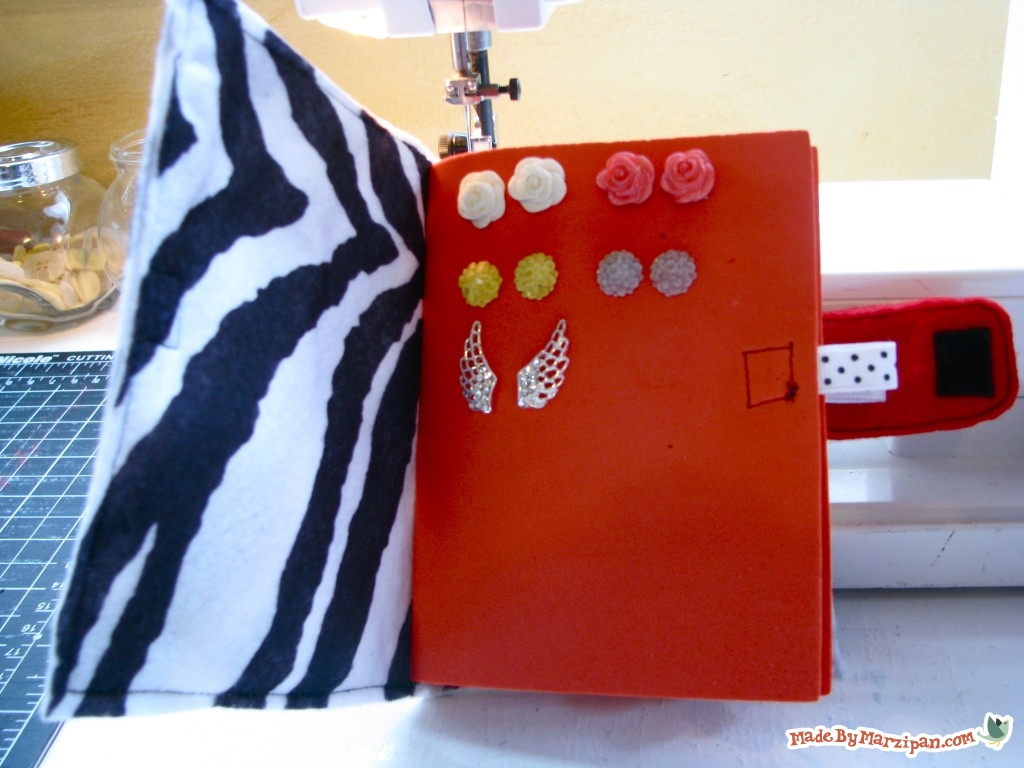
Now we’ll create the foam pages. Fold the foam in half width-wise to create a crease. Add fuzzy Velcro to the interior left hand side.
10
Cut a segment of ribbon to about 3 inches. Fold it in half to create a loop. Tuck it beneath the rough Velcro, and sew on the left-hand side of the foam. This creates a handle to tug on so the foam won’t rip when you open the pages.
11
Repeat those steps to create a second page that’s identical to the first.
12
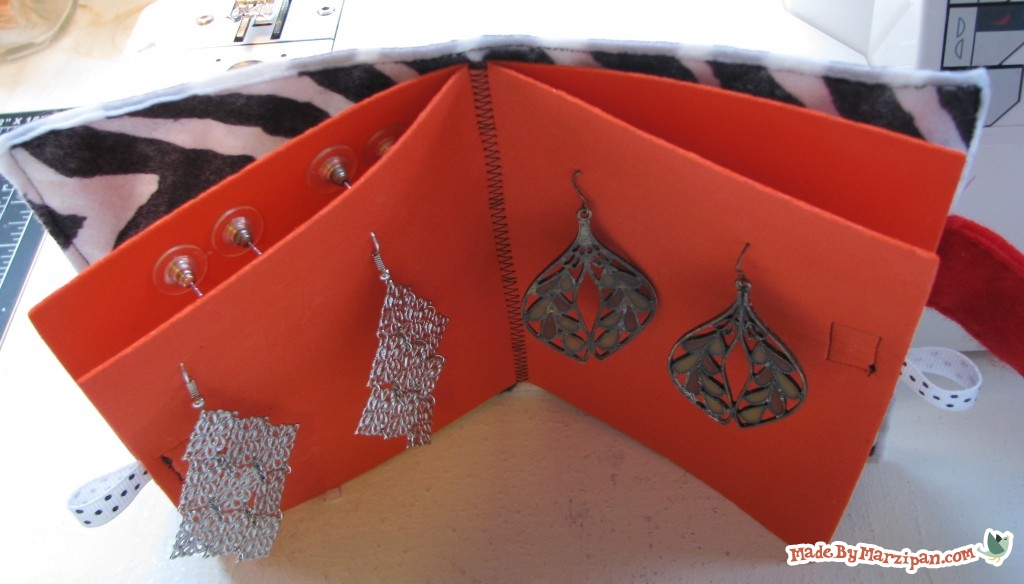
Now we’ll add the pages to the booklet. Open the cover. Lay one foam page on the inside. It should be open, with the ribbon loop on the left.
13
Lay the second page on top of the first, but with the ribbon loop on the right. The Velcro tabs should match up and close.
14
Use a zig-zag stitch to sew a seam down the center of the pages. Use the fold crease as a guide.
15
To use your earring case, pull on a ribbon loop to undo the Velcro. Poke an earring through the foam, and secure with an earring back on the other side. Earrings will slide through easily.
16
It works nicely to add post earrings to the front side of a page set, and dangling earrings to the backside of a page set, because the backings won’t tangle.
Made By Marzipan may have received product or payment for this post. Posts may contain affiliate links. Disclosed in accordance with the Federal Trade Commission's 16 CFR, Part 255.

 Finished?
This is very cute and practical. I have also seen plastic canvas used to hold earrings. How can I get the templates for your Mobile Doll House? I have tried to email you, but have not had a response? I am making the dollhouse for my niece’s children, ages 2 & 4. Thank you.
Do you have pictures that go along with the steps?
This is great! I made one a few years ago using needlepoint fabric for the pages (you can hook earrings thru the small holes in the needlepoint fabric), but the book was always floppy. These foam pages would hold their shape much better!
I like this i will make one for my daughters, and for me when i travel lol
sew handy! ^_^
finally I found something useful for all that foam
Cool
I love your tutorials!! You explain everything so clearly. Very creative and economical projects !! Thank you
I love all ur videos xxxx
This is one of the best tutorials I’ve seen on YouTube. Nicely done. Thanks!