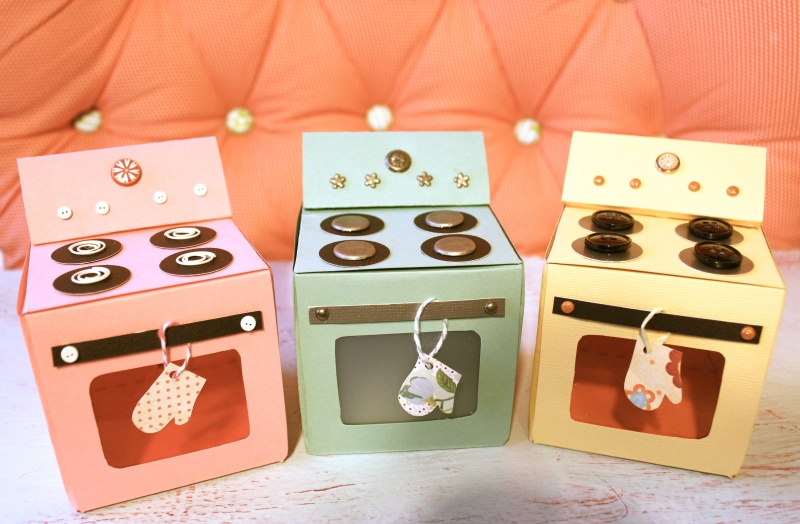
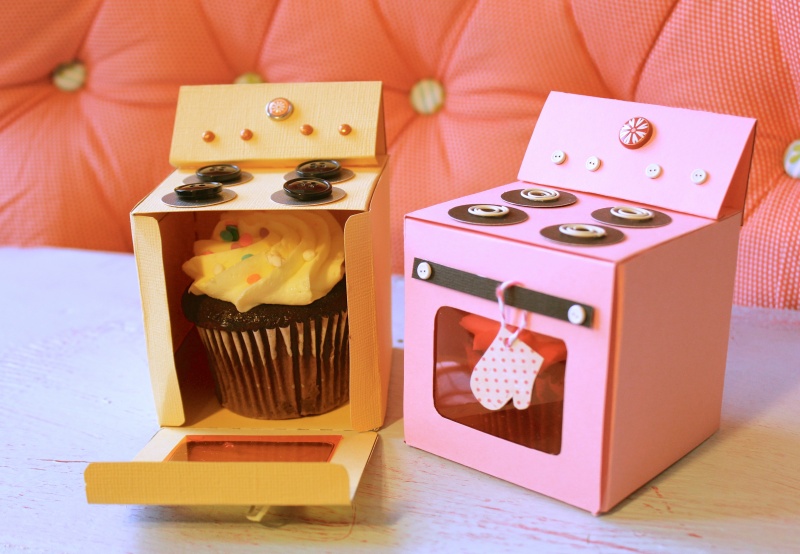
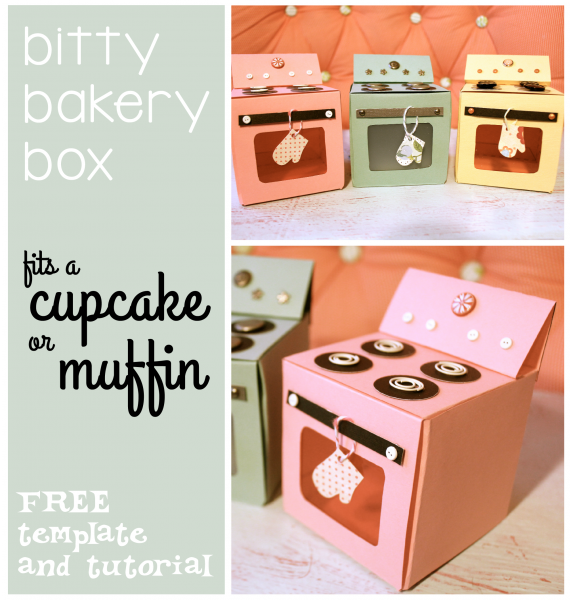
Enjoy my free template and tutorial for this Bitty Bakery Box. It’s the perfect size for a homemade cupcake or muffin!
How to:
1
Cut two sheets of card stock or heavy weight scrapbook paper to 8.5 x 11 inches so it will fit in your printer. Print the FREE Bitty Bakery Box template (click here). Do not resize or scale.
2
On this template, dark lines indicate where to cut. The dotted lines show you where to fold; do not cut on the dotted lines. Cut out all pieces of the template along the dark lines. Also remove the center rectangle that is labeled “door.”
3
Now we’ll make folds along each of the dotted lines. The printed side of the paper will end up being the inside of your box. It may be easier for you to fold backwards on the dotted line first, so you can see precisely where to crease. Then crease the opposite direction, bringing the fold inward. All flaps should be folded inward. Do this on all pieces.
4
Next we’ll join the two pieces of the box together. The flap with the star printed on it will overlap the other piece printed with a star. The edge of the paper should align with the dotted line on the flap.
Adhere the pieces by adding glue dots to the back side of the flap with the star. Add the glue dots to the unprinted side, then press to the other piece.
5
Add glue dots to the back side of the two flaps on the “bottom” piece. Fold the paper upward along the crease on the star flap. See how this creates a box shape? Adhere the flaps to the sides of the box.
6
Repeat this process with the top flaps. Adhere to the interior sides of the box. Be sure all edges are lined up evenly.
Making the Control Panel
7
Now we’ll make the oven’s control panel. You’ll notice there are dots printed on the inside. You can use a small hole punch or pin to make holes for brads, to mimic the buttons on the control panel. (Alternately, you could draw or cut your own from paper.)
8
The narrow folded strip will adhere to the top of the box, and the other folded half will adhere to the back.
Add glue dots to the unprinted side of the control panel’s narrow fold. Adhere to the top of the box, about 1/3 of the way from the rear of the box.
9
Place adhesive on the remaining long edge of the control panel, on the printed side. Adhere to the back of the box.
10
Cut a scrap of plastic or cellophane into a rectangle slightly larger than the hole on the door. Adhere this to the interior of the oven door.
Making the Oven Mitt
11
Now we’ll make the oven mitt. Cut out the shape roughly, then adhere it to the back of a scrap of printed paper. Trim neatly around the mitt.
12
Make a small loop from ribbon or twine, and adhere to the back of the mitt.
13
Next we’ll make the burners on the stovetop. You can use black buttons, paper circles, or brads. Add four burners to the top of the stove.
14
Cut a scrap of black paper into a rectangle to create the door handle. Add a brad to each end to mimic screws.
15
Slide the rectangle through the loop on the oven mitt so it will hang from the door handle. Adhere the handle with glue dots or foam pop dots.
This box will fit a regular-sized cupcake or muffin. Do not place in microwave or oven.
Made By Marzipan may have received product or payment for this post. Posts may contain affiliate links. Disclosed in accordance with the Federal Trade Commission's 16 CFR, Part 255.


 Finished?
Love this! thank you
This is the cutest idea ever! I love it
Great tutorial
thecraftartykid.blogspot.co.uk/
how to get free template of bitty bakery box ?
The Bitty Bakery Box template is found here: http://www.madebymarzipan.com/?p=4951
Just type marzipan oven box template , where it says click here on the 2nd instruction on how to make the oven box click it,and after the template comes up , print it.
Is beautiful! was looking for this long time! thanks!
Adorable! Thanks so much for making it free! The others I’ve seen you have to pay for. I like yours better anyway! Great job! :)
Thank you again!
Thank you for the template, can you think how interesting this “stove” will mak a kitchen tea invite?
Hi there – This is so cute. Thank you for sharing. I printed the template last night but there were very score lines? Rhonda
Appreciate this post. Will try it out.
cool
Oh Darling how divine this oven cupcake box is! It is simply to die for
Oh Darling how divine this oven cupcake box is! It is simply to die for.
Remember the full stop
Hey Alice you forgot the full stop too.
“Remember the full stop” – from Alice
correction- Remember the full stop.
.
Don’t forget the full stop!
;)
Amazing design, so pretty! Perfect gifts for my besties!!!!!!!!!!!!!!
Can you send me the picture that i have to print for making the box??
Hi there, you can get the template from the download box on the right :)
Heyy,
Love it ! but what did you use on top of the pink oven the burners ?
Thank you so much for this simple but useful information on making cupcake box. This will make my granddaughter’s birthday a memorable one.
I love you.
Thank you for making the template free! I was looking on how to make a little oven to announce my pregnancy to my coworkers and friends. I will do the whole “Bun in the oven” and put a mini cinnimon roll inside.
you will love it
thank you so much for the pattern and tutorial, that is veryind of you
Oh, this is just so cute! Thank you~
Can I pay you to make me 50?
Hi Teri, I’m glad you like them, but I don’t make items for retail sale :)
This has to be one of the cutest things I have ever seen!!
Aw thank you!
This is the cutest idea I have seen in I don’t know how long. Thanks for sharing it.
Hi! I’ve been following your web site for a long time now and
finally got the bravery to go ahead and give you a shout out from Porter Tx!
Just wanted to tell you keep up the excellent work!
#8 of the control panel-you said there should be a narrow strip marked to fold?
It’s a beautiful box Thank you for template.
Thanks for your generosity! Will be an excellent addition for kid’s baking class at church.
Excellent site you’ve gott here.. It’s difficult to find excellent writing
like yours these days. I truly appreciate individuals like you!
Take care!!
I can’t find the template???
It’s right above the supply list :)
Really great idea and thanks for the template (free). Your tutorial is on point.
I come from Malta and I would like to ask you if you could send me the template of the oven cupcake template box , if yes let me know the cost and I will send you the money I hope it is a yes as I like them so much . Thank you for your help .
u r very nice and very very kind . thank u very muck for this biautiful site.
Thanks for visiting! :)
thank you this is wonderful!!!
What a cute gift box and thank you for sharing your talent with us.
Thank you!
Muchas gracias por el pap y la plantilla hace mucho lo buscaba
Thank you for a very useful post!
Thank you for template
What a pretty idea! these would look cute little gift.
Thank you for template.
I love your little oven. I would like to make it smaller as I would love it for my mini house. You say not to scale or re size. So are you planning to make a smaller one? Thanks
No, I just meant that there’s no need to adjust your printer settings to make the size shown.
does not print dotted lines
This would be great for a baby shower, bun in the oven reference. This is so amazing.
lol
These are the CUTEST!!! Thank you for posting and sharing for free! Much appreciated! Great, easy tutorial!
This idea is really great :)
Does anyone know how to BROWSE through blogs by subject or whatever on blogger?.
Is this ever adorable or what.
Just finished making this box. Can’t thank you enough for being so generous and sharing this lovely design. So much fun to make!
What are the dimensions of the box? I know at the bottom is states perfect for any homemade cupcake or muffin. If I were to purchase cupcakes from a gourmet bakery, would they fit in the box?
merci