Finished sewing your quilt blocks? Here’s how to put them together!
Updated: To see the tutorial on How to Bind a Quilt With Mitered Corners, click here.
To see the tutorial on How To Make a Log Cabin Block, click here.
How to:
made with
1
Begin by laying out your blocks in the preferred order. You may want to make sure they are all pointing the same direction. Make sure that the colors and prints feel balanced when they are viewed as a whole.
2
We’ll first sew the blocks into horizontal strips. I recommend that beginning quilters do this in 3-block segments. Start by laying the first block in the row face down on top of the second block in the row. Pin along the left side.
3
Open the blocks. Lay the third block face down on top of the second, and pin along the right side.
4
Sew along the pinned sides with a ¼ inch seam. Be sure that you are only sewing through two blocks at a time. Then press your seams. (I prefer to press on the top of the fabric.)
5
Repeat with the next set of 3 blocks, and continue until you reach the end of the row.
6
I only have 6 blocks in a row, so I’m ready to sew my two sets of blocks together. Lay the first set face up, and add the second set face down on top, aligning the edges. Double check that the blocks are right side up and facing the same direction. Pin along the right side.
7
Sew with a ¼ inch seam then press.
8
Repeat with the remaining rows of blocks. To attach the rows, lay one strip face down on top of another. Sew along the long edge with a ¼ inch seam.
Adding the Backing
There are many ways to put a quilt together, but in this tutorial I’ll focus on the easiest methods.
- I highly recommend using a fabric adhesive spray to stabilize the layers. This means you can skip pinning, and the layers are much less likely to shift or wrinkle during sewing. For best results, select a spray that will dissolve when washed.
- A bed sheet makes an easy and inexpensive backing for a quilt. It also means you won’t have a seam down the back where you joined fabrics. Beginners may want to avoid using fabric with a directional pattern; solid colors are more forgiving.
- Low-loft batting is the easiest to sew through, and is especially recommended if you don’t have a walking foot for your machine.
1
Spread the backing fabric face down. Do your best to smooth out any wrinkles.
2
I’ve selected a low-loft cotton batting for this quilt. Take a moment to read the packaging, as it has important information about care and washing.
3
Fold the batting in half on top of the backing. Spray the adhesive directly on the uncovered half of the backing fabric. Then unfold the batting, smoothing it down over the sprayed half of the fabric. You can reposition the batting for a while, so take the time to smooth out any wrinkles. Repeat with the other half of the batting.
4
Now we’ll repeat the process with the assembled quilt top. Center the quilt top on the batting and fabric layers. Fold in half. Spray the back side of the folded quilt top, then unfold to adhere it to the batting. The quilt top should be face up. Smooth out any wrinkles.
5
Repeat for the other half of the quilt top.
6
If your batting and backing are larger than your quilt top, you can trim most of the excess– but it’s a good idea to leave a couple inches of overhang if possible.
Prepping for Quilting
- Quilters can buy water soluble pens to draw sewing marks, but they can be difficult to see on colorful patterned quilts.
- Masking tape, painter’s tape, and washi tape make great sewing guides. These tapes come in various widths, and can be used to create stripes or a grid to follow on your quilt top.
1
Since this log cabin quilt has straight seams, I’m only going to use tape to mark my beginning rows of stitches. After that, I can judge where the next row should be, by following the previous stitches, and remaining parallel to the seams.
2
I’m sewing this quilt on a regular sewing machine, so I’ll need to roll up one side to reduce bulk. Tightly roll from the right towards the center, and secure the top and bottom ends with clothes pins. (Later, when you’re ready to sew the other half of the quilt, you will roll the opposite side and turn the quilt upside down to feed it through your machine.)
Quilting the Layers
- If you happen to own a walking foot for your machine, this is a great project to use it on. A walking foot helps to feed the top and bottom layers of fabric evenly through the machine. (If you don’t own one, that’s okay, you’ll be fine if you’ve used low-loft batting.)
- If your machine came with an add-on table, use it.
- Place your sewing machine at the right end of a long table or desk, so that you can place the bulk of the quilt on the table top and you aren’t fighting gravity.
- I also like to load several bobbins with thread before I get started. You’ll use a lot of thread, so this will save you time.
- You can use any color of thread, however, beginning quilters may want to select a shade that blends into the fabric. Clear nylon thread is also an option, however, it’s more difficult to unpick and can feel a little scratchy.
1
I’m lining up the edge of my sewing foot with the edge of the washi tape in the center of my quilt. (It’s a good idea to begin quilting in the center, so that the fabric flattens out evenly on both sides of the quilt.)
2
While sewing, place both hands flat on either side of the needle. The idea is to smooth out any wrinkles while providing a flat sewing surface. (Don’t tug at the fabric or the blocks may look warped.)
3
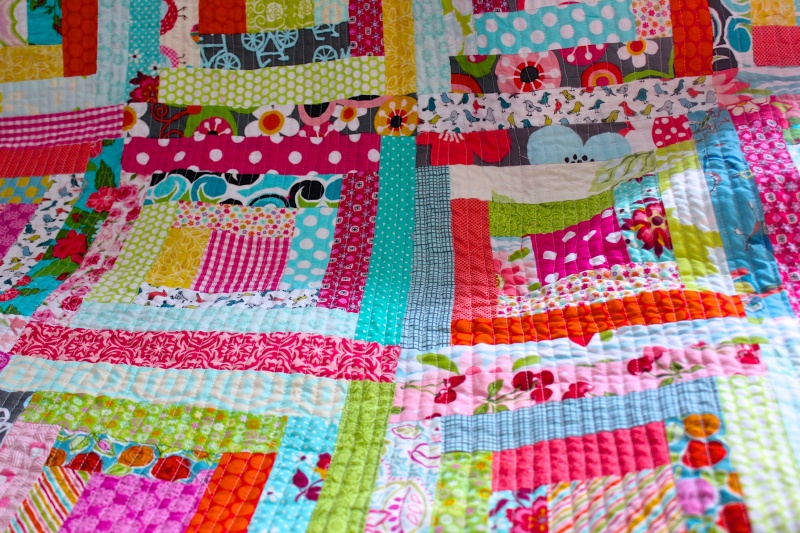
I’ve chosen one of the easiest quilting methods for this quilt: straight vertical lines. Mine are ¼ inch apart, but you can sew them up to 3 inches apart.
To see the tutorial on How to Bind a Quilt With Mitered Corners, click here.
To see the tutorial on How To Make a Log Cabin Block, click here.
Made By Marzipan may have received product or payment for this post. Posts may contain affiliate links. Disclosed in accordance with the Federal Trade Commission's 16 CFR, Part 255.


 Finished?
Hi … I am making a log cabin quilt block pillow for my dad for his birthday … the center block will be a picture of him and mom (she is no longer with us). The pillow form is 16 x 16 inches … please give me an idea of the size of strips I will need to complete this project. The center block will be approx. 5 x 5. Thanks.
Hi there! The easiest way to do this would be to replace the first 4 strips I list in the tutorial with the single 5 inch block. You’ll notice that #3 and #4 strips are 2×5 inches, so you can start with the next strip, which is 2 x 6.5 inches. Your pillow will be larger than my 12 inch block, but you can just continue to add strips to each side until it measures the size you want. By the time you get to those outer strips, you’ll be an expert and will know exactly what to do :)
Thanks so much for the information … I will now get busy!
Your tutorials on this quilt are wonderful! I’m a very new quilter, but I’ve created two-thirds of my squares for the front already! I hope to assemble it by this weekend. My only request is that you upload your quilt binding video soon. Thanks so much!
The binding tutorial is uploading right now, it should be available by tomorrow :)
I would REALLY love the quilt video where you assemble the quilt and then quilt it as well …I’m a visual person…love your help! Thank you.
Search for “quilt” and you’ll find them! One is called “How To Assemble a Block Quilt” and the other is “How To Bind a Quilt With Mitered Corners.”
I just wanted to say, I am new to quilting so need all the help I can find. your site is amazingly helpful and I now have before me a log cabin block! I cant believe it turned out ok after following your step by step advice. many many thanks for your tutorial so easy to understand.
That was a wonderful video, thank you so much. I would like to receive more information on this project. How many blocks for a Queen size quilt? I have lots of scraps but how much for each color do I need?
Thank you so much.
Claudette
how many squares for a queen and king size quilt
Thanks for the tips
Thank You for the tips. I usually watch Jenny Doan/ Missouri star
I have learnt so much from her. Thank You – Louise Visscher
I love your video. Now all I need is the binding and also how many squares to make a queen quilt. Since this is my first time I am a little nervous. With your help I think I can do this. It looks so easy. Thank you so much. I just can’t wait to get started.
Please show me the finished quilt and how to assemble it. Thank you
Very nice video with very clear descriptions especially for the beginners. Thanks a lit for sharing it.
I feel more confident after watching your tutorials. thank you.
I believe you gave incorrect measurements for your logs. After 10.5 they dont fit. Please advise.