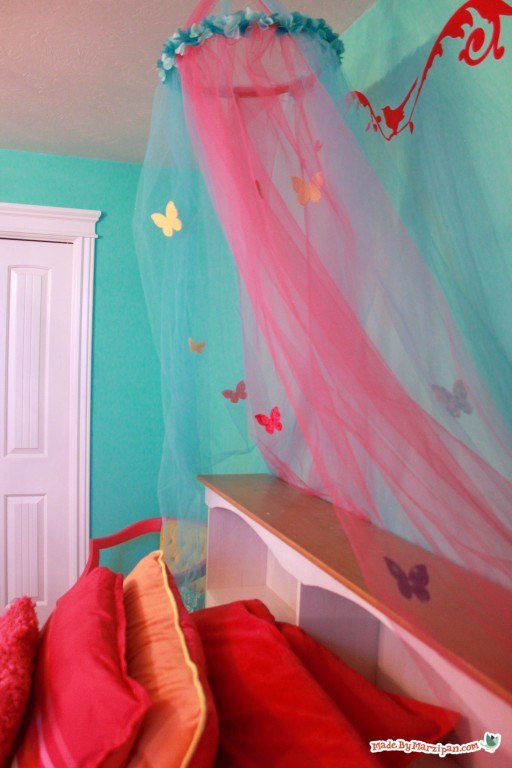
Create a simple no-sew tulle canopy!
Tips:
1
A canopy is the perfect touch in a girl’s room, but they can be expensive to buy and time-consuming to sew. That’s why I came up with this simple no-sew version using inexpensive tulle, and dressed up with adorable iron-on butterflies from ShabbyFabrics.com.
2
You’ll need a large embroidery hoop for this project. Mine is 14 inches, but 12 inches would work fine too.
How to:
made with
1 yd trim
pre-fused applique butterflies
1
Divide the smaller interior hoop into quadrants by marking the half way point on the top and bottom, and left and right.
2
You’ll also need 6 yards of tulle in color A, and 6 in color B. (Mine cost .99 a yard.) Trim off four inches from the bottom of each piece.
3
Then fold each piece in half so it’s about 3 yards long, and cut in half to make 4 piece that are almost 9 feet long.
4
Each piece will be glued within a quadrant of the hoop. I’m leaving my pieces doubled over so the tulle is two layers thick, as it was while on the bolt. Bunch the tulle a bit to fit it within the quadrant, then loop it around the hoop and hot glue to the inside. (Be careful that you don’t burn your fingers!)
5
Repeat with color B. Then add the remaining two strips, alternating colors.
6
Now we’ll add the loop for hanging. Double the 4 inch strips so they have two layers of tulle. Loop one end of a strip where the quadrants meet and hot glue to the hoop. Glue the other end on the opposite side of the hoop.
7
Cross the second strip with the first by wrapping it once around the center of the glued strip. Adhere to the remaining quadrants.
8
Add the large exterior hoop and tighten.
9
I’m going to up the cute factor on this tulle canopy by adding pretty fabric butterflies. I found these pre-fused, laser cut shapes at ShabbyFabrics.com. These are pre-cut and have an iron-on adhesive on the back, which means there’s no cutting or sewing required! I’m using two packages, one with small butterflies and one with large. I love the colorful patterned fabrics!
10
Because tulle is a synthetic material, we’re going to take a few precautions. First, set your iron to a low heat with no steam. Second, tear off a large piece of parchment paper to protect your material as you iron. If you touch the iron directly to the tulle, it can melt, so keep the tulle covered with parchment paper as you press.
11
Since the tulle is sheer, I’m pressing two butterflies back-to-back so they look beautiful from all angles. Peel the paper backing from the butterflies, then layer two together with a single layer of tulle between. Place the parchment paper on top and press to fuse. You don’t need to move the iron around. Check to make sure the appliqué is adhered, if not, press a bit longer. Once these are on, they’re not going anywhere!
12
Add butterflies, pressing some at varying angles.
13
Hot glue trim around the exterior of the hoop. I used a ruffly trim, but you could use pom-pom trim or even a feather boa.
14
Hang from the ceiling with a hook.
Please put safety first, and do not use a canopy over a crib or in a small child’s room, as there may be a risk of entanglement.
Made By Marzipan may have received product or payment for this post. Posts may contain affiliate links. Disclosed in accordance with the Federal Trade Commission's 16 CFR, Part 255.


 Finished?
Very cute!! Think I may have to try this soon :D