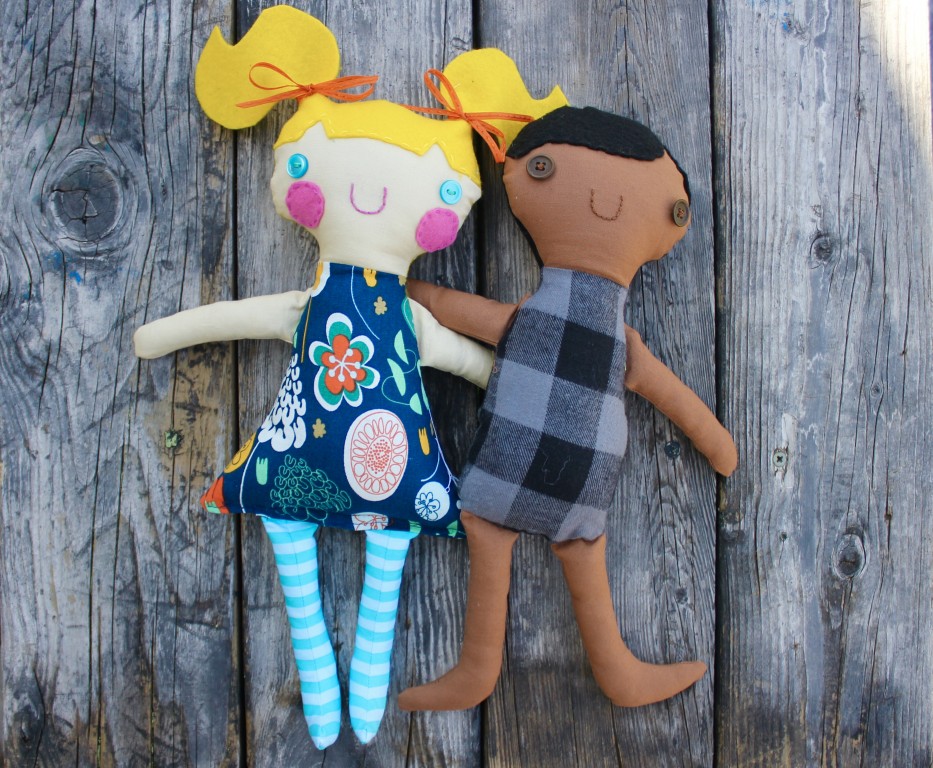
Learn how to make three variations of a rag doll: a girl, a boy, and a mermaid! Free printable pattern.
▾ | Mermaid & Rag Doll Pattern |
ADDING A FACE
When it comes to adding a face to your doll, you have some options. You can hand sew button eyes and stitch a mouth. Or you can use acrylic paint or fabric paint to create the face.
You can either hand stitch the hair to the face with embroidery floss for a vintage feel, as I did with the boy and girl dolls, or you can sew it with your machine, as I did for my mermaid.
SEWING THE TORSO
GIRL: For the girl doll, match the neckline of the dress to the neckline of the head, right sides together, so the dress is covering the face. Repeat for the back of the head.
BOY: Do the same for the boy, flipping the torso on top of the face, right sides together, and matching the neckline. Pin, and sew with a ¼ inch seam along the neckline. Then press.
MERMAID: We have a little extra work for the mermaid. Pin the felt bikini top to one torso piece, and the band to the other. Pin so they extend slightly past the edge; this allows you to easily line up the bikini and band pieces. Topstitch the bikini pieces, then trim the excess felt to align with the torso.
Fold down the torso piece so the wider edge aligns with the top edge of the tail piece. The fabrics should be right sides together. Pin in place, then attach with a ¼ inch seam. Press the seam.
Now fold down the head piece so the neckline of the head and the neckline of the torso align. Right sides should be together. Sew along the neckline with a ¼ inch seam.
SEWING ARMS AND LEGS
Next we can sew the limbs. Place two matching pieces right sides together and sew with a ¼ inch seam, leaving the top open for turning. I chose a striped fabric for the girl’s legs, and kept the skin tone for the boy’s. If you’re sewing the mermaid, you’ll just need to make the arms.
Notch the outward curves on your seam, and clip the inward curves. Be careful not to snip your stitches. Turn the limbs right side out. You may find it helpful to use tweezers. Stuff with poly-fill, leaving the top ½ inch empty.
Pin the arms on top of the torso, pointing inward and crossing each other. Then lay the back piece on top of the front piece, right sides together. Pin all the way around, being careful to line up all the edges.
MERMAID: When sewing the mermaid, leave a 3-inch gap along one side of the tail for turning.
GIRL: When sewing the girl, leave gaps along the base of each pony tail so you can pull them through. Leave a 4-inch gap along the bottom of the dress to add the legs later.
BOY: For the boy, leave the bottom curve of the torso open to add the legs later.
TURNING AND STUFFING
Clip and notch the curves. Turn right side out.
GIRL: Carefully pull the pigtails through the holes. Stuff the torso and head of the doll. Insert the legs. I decided I like it better when the seams on the legs face the front. Machine sew along the bottom to close. You can stitch the small holes on the back of the girl’s pigtails shut, then add ribbon bows.
BOY: Stuff the doll, then insert legs at bottom. Fold fabric inward and machine sew to close.
MERMAID: Pinch the hole shut and hand sew with a blind or ladder stitch. You can hand sew a felt flower in her hair.


 Finished?
Can’t wait to try the mermaid pattern. Thank you. The pencilholders are great also.