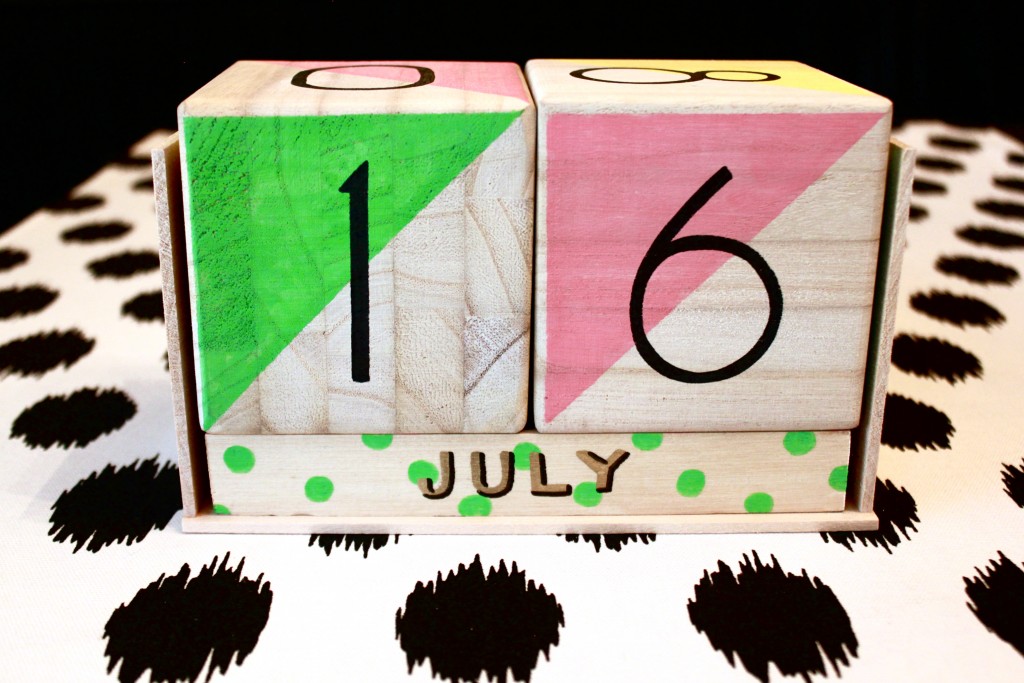
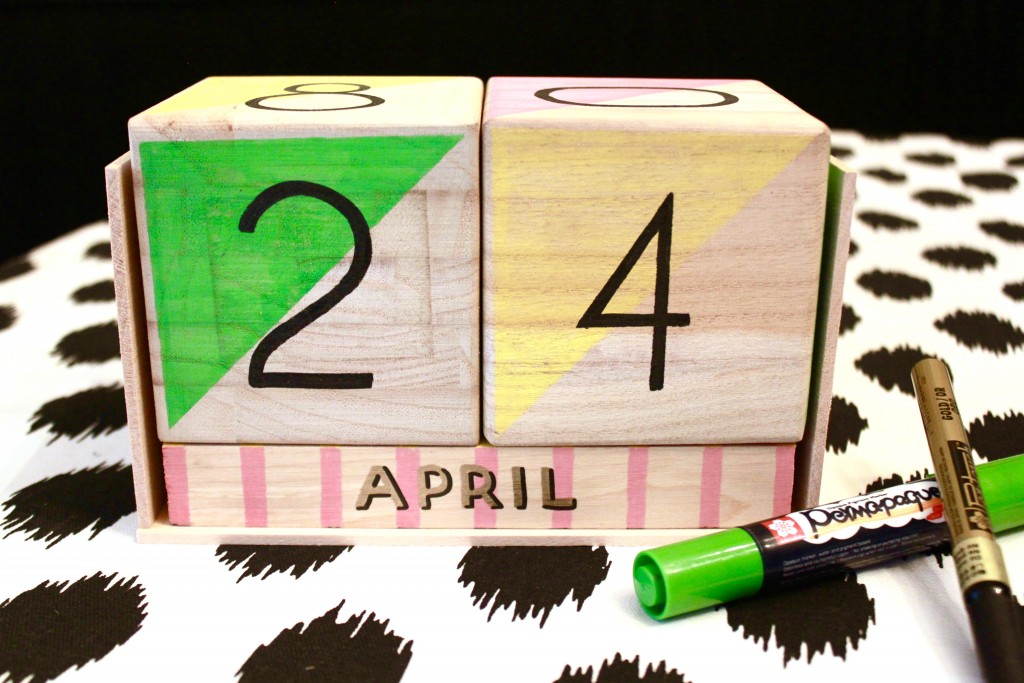
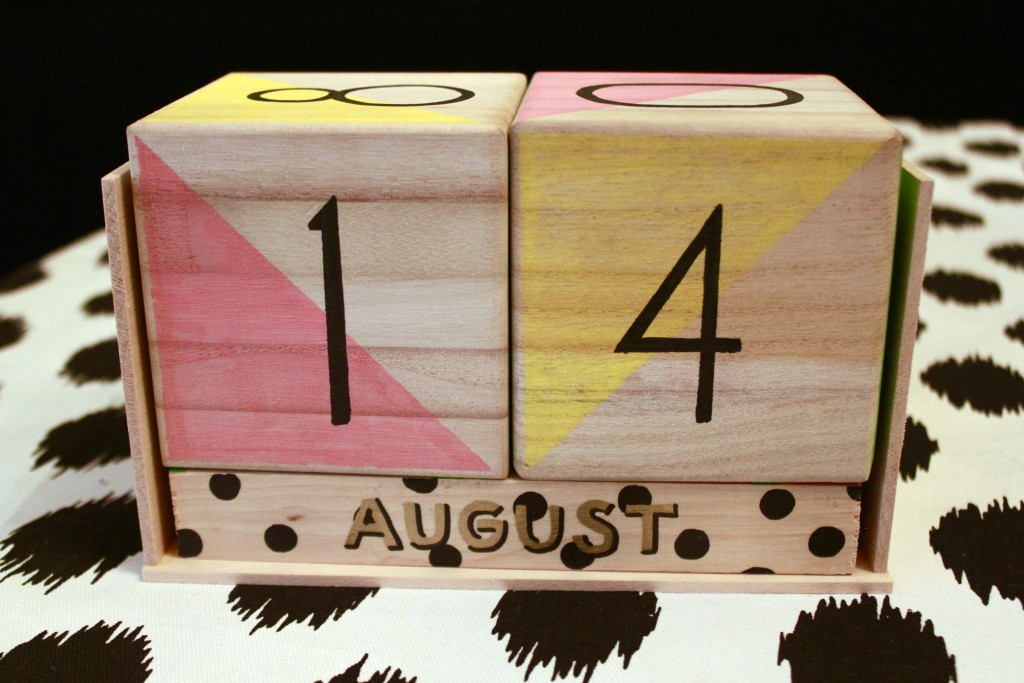
This simple calendar looks great on a desk and is complete with every day of the year.
Tips:
If you don’t want to build your own calendar, you can purchase kits online. However, the ones I found were about half the size I’m making, so take that into consideration.
How to:
made with
lightweight wood, 4 x 24 in
rectangle dowel, cut into (3) 1 x 7 in pieces
saw
1
I’m using two blocks that are 3 ½ inches square. To make the stand, I used a 2 foot x 4 inch lightweight plank of basswood I bought at the craft store, cut into 4 pieces. The back piece and bottom piece need to be cut slightly larger than the width of your two blocks put together. I cut mine to 7 ½ inches. (Take into account the thickness of your wood; if your wood is thicker, you’ll need to cut your pieces a bit longer.)
2
Use a quick-dry wood glue to adhere the back and bottom pieces at a 90 degree angle, with the back piece resting on top of the bottom piece.
3
For the sides, I cut two pieces to 3 ¾ inches, and adhered these on top of the bottom piece at a 90 degree angle.
4
You’ll also need to cut 3 wood rectangles, which will have the names of the months. I found a 3-foot rectangle dowel at my craft store for a couple dollars. Cut to the same length as your two blocks put together. The width of all three rectangles put together should be about the same as your block, but it’s okay if the rectangles are slightly smaller. My block is 3 ½ inches, and my rectangles are 1 inch by 7 inches.
4
Now we can start decorating our blocks! I tested out a few different mediums on a piece of scrap wood, and I really liked the effect of my Permapaque® markers. They have a beautiful finish that doesn’t look thick or streaky like paint, or bleed into the grain of the wood like regular markers. I’m also going to add a little sparkle with a gold Pentouch® marker.
5
I like to use washi tape or masking tape to get crisp straight lines. I’m wrapping tape around this block at regular intervals. Then I color in the blank areas with a Permapaque® marker. There’s practically zero dry time, so I can move on to the next side right away. Unlike paint, I don’t have to wait for my design to dry before removing the tape.
6
Although Permapaque markers come in a variety of colors, I’m opting to keep it simple with a fresh palette of pink, yellow, and green, grounded with black. I decided to put stripes on the first block, polka dots on the second, and a zig-zag chevron on the third. But you can draw whatever design you’d like.
7
I’m choosing to color half of each block’s surface. Add tape diagonally from corner to corner. Protect the side edges as well. The markers I’m using feature dual nibs, with one end being a point that’s good for detailed work, and the other being a chisel that’s useful for filling in large areas.
8
I’m just using the pink, yellow, and green for this, with the same colors on opposite sides of the cube.I love how this ink goes on smoothly, with a matte finish that almost looks like a wash or stain. The lighter colors allow the wood grain to peek through, which is a really pretty effect.
9
Now we’re ready to add numbers to the blocks. It’s important that we do this right, or we won’t have the correct number combinations for each day of the month. On the first block, write a 5 on the top and a 0 on the opposite side, or bottom. Add 1, 2, 3, and 4 to the sides.
10
On the second block, write 0 on the top, and 8 on the opposite side, or bottom. Add 1, 2, 6, and 7 to the sides. Note that 6 will pull double duty as a 9, so be sure that you write it in a style that’s legible in either orientation.
11
Finally, we can write the names of the months on the blocks. I’m using the gold Pentouch®for this, then adding a shadow outline with the black Permapaque® marker. The first block will have the first 4 months, the second block the next 4, and the last block the final 4.
12
To use your calendar, place the month rectangles in the bottom of the stand, with the current month facing out. Add the date blocks on top, rotating as needed each day.
Made By Marzipan may have received product or payment for this post. Posts may contain affiliate links. Disclosed in accordance with the Federal Trade Commission's 16 CFR, Part 255.


 Finished?